
Day 20 of Advent of Code is here! Wowza, this was a big one. Part 1 was quick, part 2 took the better part of two days to work through. It was a blast!
See all of my other solutions here. Please do check out what my colleagues at Slalom are doing with their Advent of Code! You can see this and my other solutions on github.
Day 20: Jurassic Jigsaw
Part I
I found this challenge fun as I imagined this is what an image recognition app might look like, if provided several photos and it has to splice it all together. Of course, images are WAY more advanced than our input
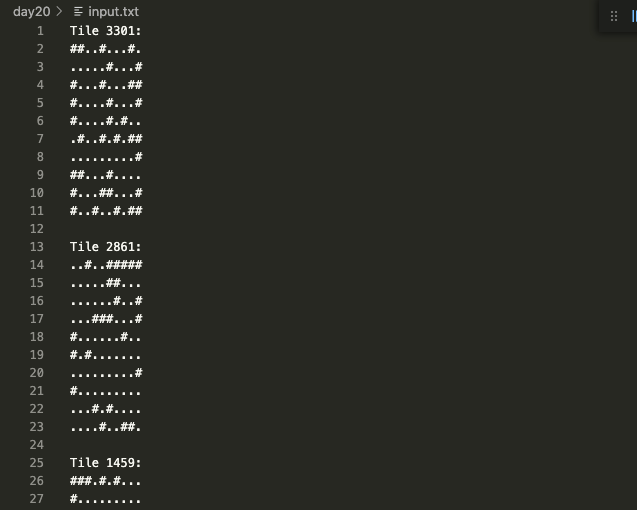
I have 144 tiles like the above, and the goal is to match them all to make an image, 12×12 tiles. They have to match on their edges, but the tiles could be flipped or rotated.
const fs = require('fs');
let tiles = []
fs.readFileSync('./input.txt', 'utf-8').trim().split('Tile').map(t => {
  if(t) {
    const lines = t.split('\n').filter(l => l.length > 0)
    const tile = lines.slice(1)
    const topEdge = tile[0]
    const bottomEdge = tile[tile.length - 1]
    const leftEdge = tile.reduce((a, b) => `${a}${b.substring(0,1)}`,'')
    const rightEdge = tile.reduce((a, b) => `${a}${b.substring(b.length - 1)}`,'')
    tiles.push({ id: Number(lines[0].trim().replace(':','')), data: tile, edges: [topEdge, bottomEdge, leftEdge, rightEdge, reverseValue(topEdge), reverseValue(bottomEdge), reverseValue(leftEdge), reverseValue(rightEdge)] })
  }
});
Given I knew what I needed from my data, I decided to process the input data immediately, instead of importing it and then processing it in another variable
- We first split the
input.txton the wordTile. This will create an array where each item is one tile - Then we loop through that array using a map()
- We then split the tile by a line return to get all of the lines
- I grab the edges we need:
topEdge,bottomEdge,leftEdge, andrightEdge.- Top and bottom are easy, those are the top and bottoms of the array
- Left and right are a little trickier, as they span the edge of the array. I use a reduce() to loop through the
tilearray and grab the first character for the left edge and the last character for the right edge
- Finally, we push these edges, along with the tile id, into the array
tiles- You’ll see we’re pushing all tiles into one parameter called
edges. The puzzle wants me to find the 4 corners of the image and process them, so I don’t need to know where every edge matches (until part 2) - When inserting into the
edgesI include the 4 edges and thereverseValueof those edges, since they could be flipped
- You’ll see we’re pushing all tiles into one parameter called
const reverseValue = value => {
  return value.split('').reverse().join('')
}
Super simple function that takes a string value, split() it on nothing (which creates an array of characters), reverse() them, and then join() them back to make the reversed string.
tiles = tiles.map(tile => {
  const matches = tiles.filter(t => t.id !== tile.id && tile.edges.some(e => t.edges.indexOf(e) > -1))
  return { ...tile, matches }
})
Next we loop through all tiles, and find who matches its edges. We are filter()ing the tiles, where the tile doesn’t equal the tile we’re on now, and where this tile has some edges that match the filtered tile’s edges. This will get us an array of matching tiles in the array matches
const total = tiles.reduce((a, b) => b.matches.length === 2 ? a * b.id : a, 1)

console.log(total)
Finally, we reduce our array, multiplying the tile’s ids, when there are only 2 matches (a corner can only have 2 matches). There’s our total!
Part II
And here comes the fun part. Now we have to actually create the image and look for a pattern in it, looking for a sea monster specifically
I pictured something like this:
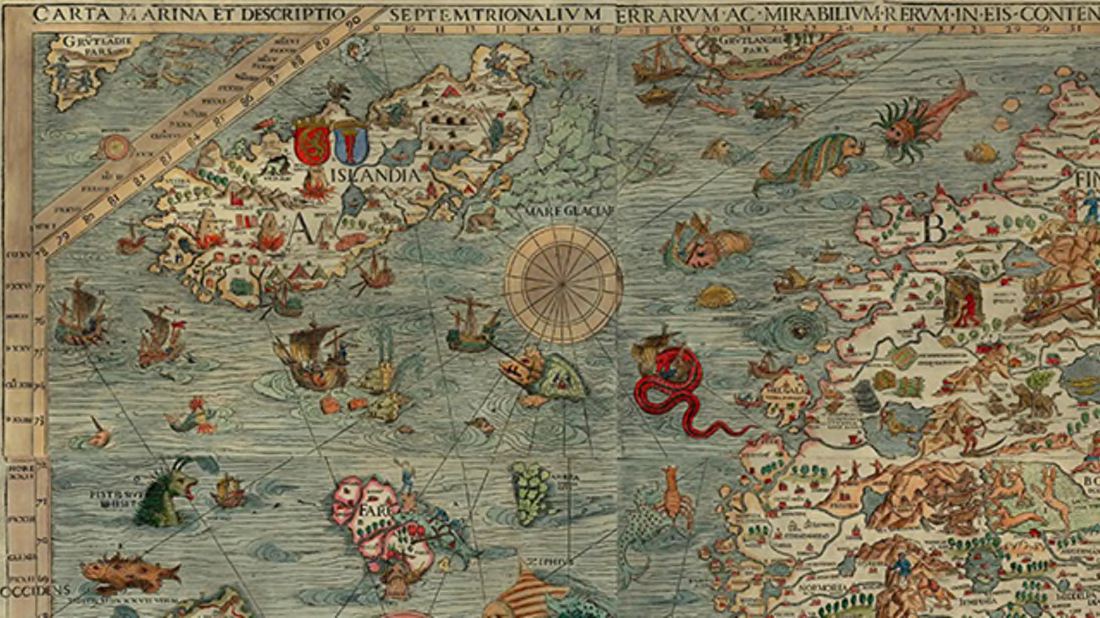
Anywhoo, back to “reality”. Part 2 blew up part 1, very little carried over.
fs.readFileSync('./input.txt', 'utf-8').trim().split('Tile').map(t => {
  if(t) {
    const lines = t.split('\n').filter(l => l.length > 0)
    const tile = lines.slice(1)
    tiles.push(new Tile(Number(lines[0].trim().replace(':','')), tile))
  }
});
Our data import simplified a lot. I had to move the edge checks out to simplify the code some. See new Tile? I created a new class object so we can easily update and reference them
class Tile {
  constructor(id, data) {
    this.id = id
    this.data = data
    this.topEdge = null
    this.bottomEdge = null
    this.leftEdge = null
    this.rightEdge = null
    this.edges = []
    this.topEdgeTile = null
    this.bottomEdgeTile = null
    this.leftEdgeTile = null
    this.rightEdgeTile = null
    this.matches = []
  }
}
My Tile class as an xxxEdge which will store the edge value, the string of the edge, and a xxxEdgeTile which will be the actual tile on that edge.
tiles.forEach(tile => {
  tile = setEdges(tile)
})

const setEdges = (tile) => {
  tile.topEdge = tile.data[0]
  tile.bottomEdge = tile.data[tile.data.length - 1]
  tile.leftEdge = tile.data.reduce((a, b) => `${a}${b.substring(0,1)}`,'')
  tile.rightEdge = tile.data.reduce((a, b) => `${a}${b.substring(b.length - 1)}`,'')
  tile.edges = [tile.topEdge, tile.bottomEdge, tile.leftEdge, tile.rightEdge, reverseValue(tile.topEdge), reverseValue(tile.bottomEdge), reverseValue(tile.leftEdge), reverseValue(tile.rightEdge)]

  return tile
}
Next we do a quick loop and set the edges, like we did in Part 1. I created a separate method for this as we need to call this anytime we rotate or flip a tile.
tiles.forEach(tile => {
  const edges = ['topEdge', 'rightEdge', 'bottomEdge', 'leftEdge']
  edges.forEach(edge => {
    const edgeTile = tiles.find(t => t.id !== tile.id && t.edges.indexOf(tile[edge]) > -1)
    if(edgeTile){
      tile.matches.push(edgeTile)
      tile[`${edge}Tile`] = edgeTile
    }
  })
})
Once all of the edges param are set, we then loop through, and start matching tiles to the edge, setting them to the xxxEdgeTile parameter. This will allow us to easily find our top left corner of our image
const topLeftCorner = tiles.find(t => t.matches.length === 2 && t.rightEdgeTile && t.bottomEdgeTile)
Again, corners can only have 2 edges match, and to get the top left, I want the corner that has a right edge and a bottom edge.
let theTile = topLeftCorner
let firstTileInRow = theTile
let ids = ''
// going horizontal first, then vertical
while(true) {
  while(true) {
Now let’s get looping. Before we do, we set theTile to be topLeftCorner, theTile will be our object we iterate on in the loop. We also store firstTileInRow so that when we finish a row, we know the start of the next row. In this loop, we’re focused on doing it row by row, horizontally first.
    ids += `${theTile.id} `
    let nextTile = tiles.find(t => t.id !== theTile.id && t.edges.indexOf(theTile.rightEdge) > -1)
We store the id in a string for logging purposes, I’ll show the output below. Then we grab the next tile to the right. Why requery for the tile? We set the edges above. Yes, we did, but once we start flipping and rotating tiles, the rightEdge is no longer the rightEdge that was once set. This ensures we’re always getting the current right edge we need.
    if(nextTile) {
      theTile.rightEdgeTile = nextTile
      if(theTile.rightEdge === nextTile.leftEdge) {
        // do nothing, they match, onto the next tile
      }
      if(theTile.rightEdge === reverseValue(nextTile.leftEdge)) {
        nextTile = flipTile(nextTile, false)
      }
      if(theTile.rightEdge !== reverseValue(nextTile.leftEdge) && theTile.rightEdge !== nextTile.leftEdge) {
        for(let r = 0; r < 4; r += 1) {
          nextTile = rotateTile(nextTile)
          if(theTile.rightEdge === reverseValue(nextTile.leftEdge) || theTile.rightEdge === nextTile.leftEdge) {
            if(theTile.rightEdge === reverseValue(nextTile.leftEdge)) {
              nextTile = flipTile(nextTile, false)
            }
            break
          }
        }
      }
      theTile = nextTile
    } else {
      theTile.rightEdgeTile = null
      break
    }
  }
Assuming the nextTile is legit (too legit to quit), we process it.
- If
theTile‘srightEdgematches thenextTile‘sleftEdge, then we’re good! Move along. - If they match, but
leftEdgeis reversed, then we just flip the tile - If they don’t match at all, that means
theTile‘srightEdgematches another edge ofnextTileso we rotate until we match it- We rotate the
nextTileand then check if the edges match. If not, rotate again - If they do match, we then check if they matched because it was reversed. If so, we flip the tile to make them match. We’re flipping the tile vertically, so the bottom is the top, top is bottom and left and right are just reversed strings
- We rotate the
- We set
theTileto thenextTileand loop again. - If the
nextTileis empty, chances are we’re on an edge, so webreakout of this inner while()
That wraps up the inner while(), but wait, there’s more!
  ids += '\n'

  let bottomTile = tiles.find(t => t.edges.indexOf(firstTileInRow.bottomEdge) > -1 && ids.indexOf(t.id) === -1)
  if(bottomTile) {
    if(firstTileInRow.bottomEdge === bottomTile.topEdge) {
      // do nothing, they' match, onto the next tile
    }
    if(firstTileInRow.bottomEdge === reverseValue(bottomTile.topEdge)) {
      bottomTile = flipTile(bottomTile, false)
    }
    if(firstTileInRow.bottomEdge !== reverseValue(bottomTile.topEdge) && firstTileInRow.bottomEdge !== bottomTile.topEdge) {
      for(let r = 0; r < 4; r += 1) {
        bottomTile = rotateTile(bottomTile)
        if(firstTileInRow.bottomEdge === reverseValue(bottomTile.topEdge) || firstTileInRow.bottomEdge === bottomTile.topEdge) {
          break
        }
      }
      if(firstTileInRow.bottomEdge === reverseValue(bottomTile.topEdge)) {
        bottomTile = flipTile(bottomTile, true)
      }
    }
    firstTileInRow.bottomEdgeTile = bottomTile
    firstTileInRow = bottomTile
    theTile = firstTileInRow
    // rotate/flip needed?
  } else {
    break
  }
}
Once the first while() is done, that means we’re done with a row. Now let’s move to the next row
- Real quick, we throw a carriage return at the end of the row string
ids - Then we get the
bottomTilefrom thefirstTileInRow. We can’t get the bottom fo the last tile we processed since that’s the last tile in the row. I guess we could get the bottom of the last tile, and then iterate to the left, but that would be unnecessarily complex. - If the
bottomTileis legit, we process it, if not, we’re done andbreakout of this outer while() - We have virtually the same rules here as we did in the above block:
- If the
bottomEdgeand thetopEdgematch, do nothing, move along - If they match when one is reversed, flip the tile
- If they don’t match rotate and flip until they match (note the flip here is flipping horizontally, so left goes to right, and top and bottom are reversed)
- If the
- Then we set the new
firstTileInRowand itsbottomTile - Then we loop again, going back up to the above code block and build out the row
This code processes my 144 tiles, creating a grid of tiles like so (this is what the ids is for)
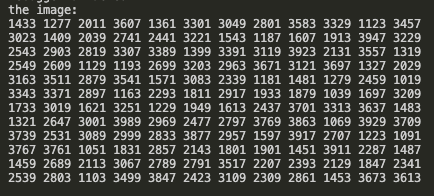
This is not the final image, just the placement of all of the tiles, rotated and flipped properly. NOW let’s create an image.
theTile = topLeftCorner
let rowPad = 0
let allData = []
firstTileInRow = theTile
let rows = ''
We are going to do a similar loop as we did above, looping through rows and columns. I could’ve combined all of this in the above loops, but that would’ve made for a wee bit more complex code with no benefit. I like my code clean and understandable ;)
Above we’re setting theTile and firstTileInRow to be the topLeftCorner again.
while(true){
  // console.log(rows)
  if(rows.indexOf(firstTileInRow.id) > -1) {
    break
  }
  rows += `${firstTileInRow.id} `
First we loop through the rows using while(). I am using rows just to store the first tile’s id to ensure we don’t loop. My data got a little funky along the way and caused a loop. This works well.
  while(true){
    const { data } = theTile
    const newData = data.slice(1, data.length - 1).map(d => d.substring(1, d.length - 1))
    for(let i = 0; i < newData.length; i += 1){
      const rowidx = i + rowPad
      allData[rowidx] = !allData[rowidx] ? newData[i] : allData[rowidx] + newData[i]
    }

    if(theTile.rightEdgeTile) {
      theTile = theTile.rightEdgeTile
    } else {
      rowPad += newData.length
      break
    }
  }

  if(firstTileInRow.bottomEdgeTile) {
    firstTileInRow = firstTileInRow.bottomEdgeTile
    theTile = firstTileInRow
  } else {
    break
  }
}
Next up we loop the row using a while() again.
- We are getting the
datafromtheTileand processing it. The requirements are that the outer edge of the tile does not contain anything of value, it was only used for matching, so we can remove the outer edge. I am doing that and setting it tonewData - Then we loop through
newDataand appending the row’s string to a new arrayallData- Since
allDatais an array, but we’re looping columns into it, we need thisrowPadto know what “row” of data inallDatato add it to. For instance, the first row goes into 0-7 ofallData, the second row goes into8-15and so on.
- Since
- If there’s a
rightEdgeTilewe can continue looping through tiles for this row. - When we hit the end, we add to the
rowPadto start the next group of rows inallData - Once we’re done with that row, we move to the next row
- We do the same check for the
bottomEdgeTile. If we hit the bottom webreakout of the while()
Now, allData is a large array, containing all of the rows of our image, and each row containing all of the text from their associated tiles.
So let’s find some sea monsters!
for(let i = 0; i < 4; i += 1){
  let finalImage = allData.join('\n')
  if(findSeaMonster(finalImage)) break

  const flippedHor = allData.map(d => reverseValue(d)).join('\n')
  if(findSeaMonster(flippedHor)) break

  const flippedVer = allData.reverse().join('\n')
  if(findSeaMonster(flippedVer)) break

  const flippedBoth = allData.map(d => reverseValue(d)).reverse().join('\n')
  if(findSeaMonster(flippedBoth)) break

  allData = rotateArray(allData)
}
We don’t know if the orientation of the image is right, so we have to check the image, flip it horizontally and vertically, and rotate it, until we find our sea monsters.
const findSeaMonster = (image) => {
  /* There be monsters:
    >                  # <
    >#    ##    ##    ###<
    >#  #  #  #  #  #    <
  */
  const seaMonsterCount = 15 // number of # in the sea dragon
  const seaMonster = new RegExp('..................#(.)+\n(.)*#....##....##....###(.)+\n(.)*.#..#..#..#..#..#...', 'g');
  const finds = new Set()
  let attempt = seaMonster.exec(image)
  while(attempt) {
    finds.add(attempt.index)
    seaMonster.lastIndex = attempt.index + 75
    attempt = seaMonster.exec(image)
  }

  if(finds.size > 0) {
    console.log(finds.size, 'sea monsters found!')
    console.log(image.match(/#/g).length - (seaMonsterCount * finds.size), 'roughness')
    return true
  }
  return false
}
The findSeaMonster method finds the monsters, and if they exist, then writes the answer out.
- The initial comments is what the monster looks like. There can be anything in the white spaces, but the
#have to be in those locations - I decided to use a regex to create the multilined dragon
.is any character#is just that, a #+says at least 1 of the previous*says zero or more of the previous\nis a line return
- The trick here is we can’t just do a normal match() with the regular expression, since our monsters may be overlapping on the same lines. Instead, we’re going to use exec().
- A normal match will ignore if another sea monster is within the characters used to find a sea monster. So if a sea monster is to the right of one, on the same rows, a match() won’t find it.
- exec() allows us to find one at a time, and then reset the index after the one we found, to find the next one, even on the same row.
- Finally, this writes out our answer!
And for some eye candy, here’s what all of my tiles and sea monsters look like:

How did it go for you?
How did you find the answer on your own? How did you do it? Anything stump you? I’d love to hear how you did! Please comment below! I have also loaded up just the challenge and code from this and my other days on github, you can follow along there too: pretty Git pages or the code in the repo.


Leave a Reply