
Above image created by Dalle-3, it just can’t get words right yet.
A little while ago I shared “GitHub recommends Jekyll to get started with blogging on GitPages” in my post “Publishing your new blog post” post. I am finally getting my hands on Jekyll as a “quick” method to get my GitHub Pages site, starwars.guide, to use a content editor instead of editing the HTML directly. I want a nice theme and a way to quickly create content pages. Let’s see how Jekyll works out!
Install Ruby first
First things first, we have to install a few supporting libraries locally to use Jekyll. Head over to the Jekyll website to get started. The instructions look easy enough for a Mac.
Installing Ruby on a Mac errors with: ossl_ts.c:829:5: error: incomplete definition of type ‘struct TS_verify_ctx’
Right off the bat, in Step 2, installing Ruby errored out on me. In my Googling, there wasn’t much out there, but there was enough to get me through. It appears there’s an issue with the openssl library version. The fix is to:
Install openssl1:
brew install openssl@1.1
Run the following to set some paths and vars:
export PATH="/opt/homebrew/opt/openssl@1.1/bin:$PATH"
export PKG_CONFIG_PATH="/opt/homebrew/opt/openssl@1.1/lib/pkgconfig"
export LDFLAGS="-L/opt/homebrew/opt/openssl@1.1/lib"
export CPPFLAGS="-I/opt/homebrew/opt/openssl@1.1/include"
Then continue with the installation steps:
ruby-install ruby 3.1.3
And so on… (finish the steps on the installation page).
Create the site
Once done with the installation steps, creating the site is straightforward. Full documentation continues on Jekyll’s site.
Create a folder to host the site, i.e. mkdir starwars-guide. If using GitHub, you can clone down the repo first, then point the following commands to that folder.
Create a Jekyll site:
jekyll new starwars-guide
This will download and do some magic. When that finishes, we can start our new site:
cd ./starwars-guide
bundle exec jekyll serve
Now open a browser and go to http://localhost:4000.
W00T! A running site!

Now, I can edit the page files and… wait… I need to edit the pages directly? I was looking for a site builder where I could have a WYSIWYG editor, a light CMS. I clearly misunderstood what Jekyll was…
But wait!
There is a nice little library, jekyll-admin, that adds an admin “backend” capability. This edits the pages in your directory for you, and gives you a much coveted WYSIWYG editor!
Open the GemFile in the project directory, and add
gem 'jekyll-admin', group: :jekyll_plugins
Then run in terminal:
bundle install
Restart the Jekyll server, then we can go to http://localhost:4000/admin and see our pages:

YIPEE!
Go on in and edit a page and explore the admin console. Pretty easy to update now!

But, it’s ugly. Let’s see about adding a nice theme/design.
Add a theme to your Jekyll site
Let’s find one. Jekyll’s site has a list of themes to check out. GitHub has a finite list of themes it supports in GitHub pages. I went with a non-supported theme, which was a little more work. Explore your options and pick one. Here’s the one I picked:
Now that we’ve found it, read the info about it and the installation should be rather straightforward.
For this theme, all I had to do was add it to a couple lines to my files.
Edit the GemFile and add the necessary package:
gem "jekyll-theme-so-simple"
Then edit the config (use the admin console) and update the theme setting:
theme: jekyll-theme-so-simple
Then we install the library and restart the server.
bundle install
bundle exec jekyll serve
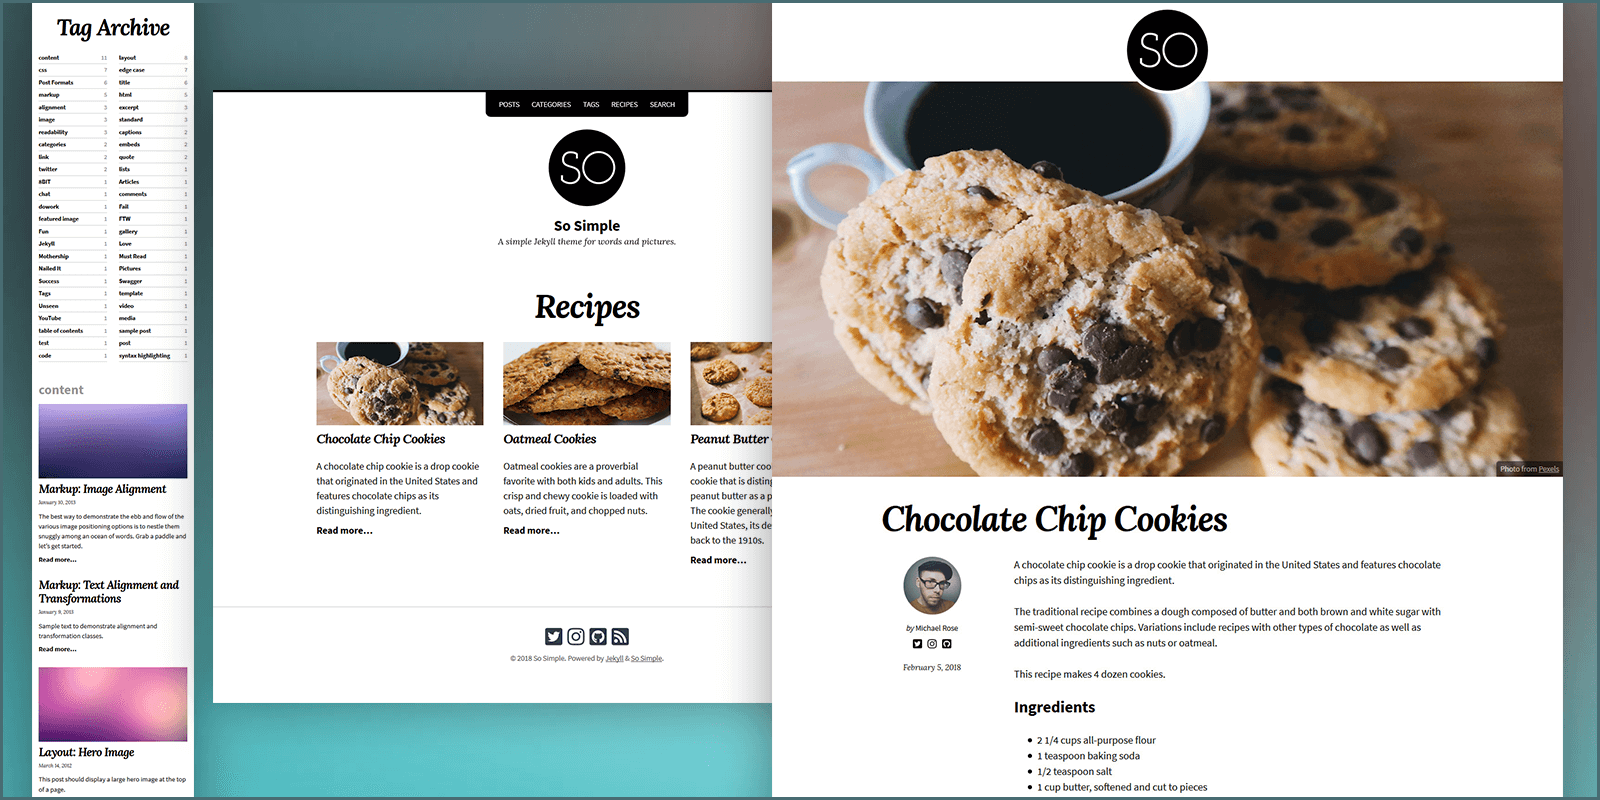
And just like that, I have a prettier site:

Now I can modify and create pages as I need.
Folders in Jekyll
Quick note, Jekyll has some reserved folders you have to be careful around. These folders are used by the system and themes. You can place files in them but you have to make sure they’re custom file names, otherwise your file will overwrite the theme’s files. Folders to be aware of are:
 _data
_drafts
_includes
_layouts
_posts
_sass
_site
Learn more about these folders and other default files at https://jekyllrb.com/docs/structure.
Getting a little fancy with Jekyll: Adding custom CSS
I am trying to show images of the comic books on my page, and when you bring in the image through the editor, it sizes it to the original image, which in my case was big:

To fix this, I wanted to use CSS to size and position my images (and I’m sure I’ll be using CSS more in the future). This took a little coding but was easy. Jekyll uses Sass to compile its CSS, which is much better than plain CSS.
- Create a custom
.scssfile in a_sass/folder (go ahead and create the folder), prefix it with_, like_sass/_custom.scss. Don’t name it_main, make it custom. - Create another custom
.scssfile in a “public” folder, this is where the .scssfiles will be compiled into a .cssfile, likeassets/css/lozzi.scss. Don’t name itmain, make it custom.- Sass will compile your
_custom.scssandlozzi.scssintoassets/css/lozzi.css, which is the path we’ll link to in a moment.
- Sass will compile your
- In your custom scss file, i.e.
lozzi.scss, add two lines of triple dashes and then import your other SCSS file, like:
---
---

@import "_custom";
- Create a
_includes/head_custom.htmland add the necessary tags to import the css, using. the/assets/css/lozzi.csspath, like<link rel="stylesheet" href="{{'/assets/css.lozzi.css' | relative_url}}"> - Finally, add the following to your
_config.ymlfile
includes:
  - head-custom.html
Restart your server and now you’re serving up CSS!
Now, we need to change how you’re handling images in the editor. When you add an image, it looks something like:

That’s markdown, and we can’t add CSS to this. So we have to change this to regular ‘ole HTML:
<img src="{{'comics/star wars yoda/star_wars_yoda1.jpg' | relative_url }}" class="comicbook" alt="Star Wars Yoda book 1" />
The WYSIWYG editor is a little misleading. It applies formatting using markdown as you’re editing it, but ultimately you’re editing the raw contents of the page itself. This makes it easy to add custom elements like images, embed videos, etc.
Now, my CSS works and I can style this as I need:

Publishing Jekyll with GitHub pages
Now, let’s get this into GitHub!
As noted above, I used a custom theme, not a GitHub one, sooo… there’s a little more work to do. The GitHub documentation mentions to use their supported themes, but I’m a rebel 🤘, and made more work for myself.
NOTE If you’re currently using GitHub pages with static pages, when you swtich to Jekyll you may get an old workflow file. I suggest disabling/unpublish your GitHub pages and then follow steps below.
Turn on GitHub Pages
Go to your repo on GitHub.com. Go to Settings tab, then Pages on the left. Under Source, select GitHub Actions. That will cause a few options to appear. Click Configure under GitHub Pages Jekyll.
You will now be in an editor, this is the yml file for the GitHub Actions (also called a workflow).
There should be nothing to do to this file, click Commit Changes in the top right, then Commit changes in the popup window.
Enable the custom theme
Edit your _config.yml file.
Comment out the baseurl line, and add a new line for remote-theme: with the same value as theme. Should look something like:
title: Aurebesh Files
email: aurebeshfiles@gmail.com
description: Star Wars fan creations.
# baseurl: ''
url: 'https://starwars.guide'
twitter_username: AurebeshFiles
theme: jekyll-theme-so-simple
remote-theme: jekyll-theme-so-simple
plugins:
  ...
Run your workflow
Fun fact, whenever you push to your main branch, the workflow will kick off by itself! On github.com, go to the Actions tab in your repo to see the status of the workflow.
Setup Ruby Error
If you run your workflow and get a Setup Ruby error like:
Run ruby/setup-ruby@55283cc23133118229fd3f97f9336ee23a179fcf
Modifying PATH
Print Ruby version
Installing Bundler
> bundle install
/opt/hostedtoolcache/Ruby/3.1.4/x64/bin/bundle config --local path /home/runner/work/starwars-guide/starwars-guide/vendor/bundle
/opt/hostedtoolcache/Ruby/3.1.4/x64/bin/bundle config --local deployment true
Cache key: setup-ruby-bundler-cache-v5-ubuntu-22.04-x64-ruby-3.1.4-wd-/home/runner/work/starwars-guide/starwars-guide-with--without--Gemfile.lock-1705acc137ac840e9d4122ec0330cb7c25c4267b0ce56b9600618a9372048306
/opt/hostedtoolcache/Ruby/3.1.4/x64/bin/bundle install --jobs 4
Your bundle only supports platforms ["arm64-darwin-22"] but your local platform
is x86_64-linux. Add the current platform to the lockfile with
`bundle lock --add-platform x86_64-linux` and try again.
Error: The process '/opt/hostedtoolcache/Ruby/3.1.4/x64/bin/bundle' failed with exit code 16
The fix is noted right in the error message. On your local machine in the repo directory, run:
bundle lock --add-platform x86_64-linux
Commit the change and push it up, which will trigger the Action to fire.
Once the action completes, go to your GitHub pages public URL (available on the Pages page where you set it all up) and you should see your site! Check out mine at https://starwars.guide.
Few more notes
- Either out of old habits or good practice, I initialized
npmin my repo to create apackage.jsonfile. In this file I created some scripts to help automate starting my jekyll server, install bundles (including the linux command), and building the site like GitHub actions does so I can troubleshoot locally. - I ended up taking the entire
scripts.htmlfile from my theme and putting it into my_includesfolder and removing the above mentionedhead-custom.htmlfile. This theme I am using has really old references to Font Awesome that I replaced. This also gives me a hair more control over everything going on my header.
Jekyll and Hyde
I’m impressed with how fast I was able to get up to speed on this site! But, I’m not crazy about it, or I guess you could say, “I’m not Hyde” (haaa see what I did there? Had to make the joke somewhere). I will certainly entertain Jekyll again because it has some strong wins:
- This is a great option for hosting pages on GitHub. This is a step up from editing raw HTML.
- I didn’t touch data files, but seeing examples, that looks like more coding. If I do dive into data files, I’ll share again.
- The countless themes available let us create a pretty site pretty quickly. Themes can be easily overwritten by importing their files and editing them as needed. Lots of flexbility there.
- The biggest challenge I had was browsing themes, there wasn’t a single clean UI to check out themes, had to click into them and review them. Kinda annoying…
- The free hosting on GitHub is great! And it is free, no ads, no need to mention github, it’s free.
What do you think? If you’re a Jekyll guru, what am I missing here? If you’re new to Jekyll, will you try it out? Let me know in the comments below!
By the time you read this, I’ve spent more time on the site, and have published it at https://starwars.guide. You can check out my site code on GitHub.
Subscribe to my blog and get posts like this in your inbox. Share your email below, or follow me on Threads, LinkedIn, or BlueSky.

