
In my previous post, I shared a winning combination of Forms, SharePoint, Flow, and PowerApps. In this post, we’re going to dive in deeper into the PowerApp I created.
I wanted to take this approach as it’s more user-creator-friendly than using the cool new custom view formatting available in SharePoint Online. I wanted to highlight the ability to embed functionality into SharePoint pages using PowerApps. Plus this took me about 10 minutes to do, pretty easy and fast. I’ll visit view formatting later.
Creating the PowerApp
Creating PowerApps is really simple, there are a few ways to do it.
What you’ll want to do here is go to www.powerapps.com, log in and create one.
Alternatively, from a SharePoint list, you can use the PowerApps menu and select:
“Create an app” to create a new app using this SharePoint list. This will create an app with the data connection made along with views and detail pages all made for you. Great way to get a head start on an app. It’s too much for what we need here.
“Customize forms” to create custom forms for the list itself, the New, Edit and Display forms. We don’t want that here, we want an independent app.
I created a new canvas app, via powerapps.com, as a new blank app, using the tablet layout.

Add SharePoint to the PowerApp
Right off the bat, let’s add SharePoint to the app. Click the View ribbon menu, then Datasources. This will pull up the Data property pane on the right. Click “Add data source”
If you’ve already been in PowerApps, you’ll see some of the previously used data sources. If not, you should at least see “Add static data to your app”. Regardless, click “+ New Connection” at the top

Scroll through the list and find SharePoint. Select “Connect directly (cloud services)”, then click Create.

On the next screen, select your site from Recent sites or paste in the URL to the site and click Go. Then select the list you want to use in PowerApps and click Connect.

Close the Data pane.
Getting the user’s SharePoint data
Now that we have the SharePoint connection, we can now get the current user’s data. I handle this in the OnVisible property of the screen.
Click screen1, click the menu on it, and rename it to Home. More best practices for PowerApps can be seen here.
With Home selected, click the Action ribbon menu, then click “On visible” button. This will cause anything put in the box to run when the Home screen becomes visible as in when the app loads on the page.
In OnVisible, I set:
Set(myResponse, First(Filter('Survey Responses', Attendee.Email = User().Email)));
Let’s start in the middle of this function and see what we’re doing.
Filter('Survey Responses', Attendee.Email = User().Email) is filtering the SharePoint connection, mine is called Survey Responses. Yours will be named after your SharePoint list. I am filtering it by the Attendee’s email address (this is a people field in the list) to be equal to the User().Email. User() is the current user, and lets you access some basic info about the user.
First( is going to return the first record from the Filter( command. Filter can return multiple rows. In my case, I knew a person can only sign up once, so I just wanted the first row, the only row.
Set(myResponse, creates a variable in my app, and stores the SharePoint row for the current user in it.
Displaying data on the screen
Insert a control, like a label, from the Insert ribbon menu.
Set the text of the label to the data you want to show. Here, I wanted to show the current user:

I set the Text property to "Welcome " & User().FullName.
I inserted another label control and put in Text “Heart Track”. no data, just text.
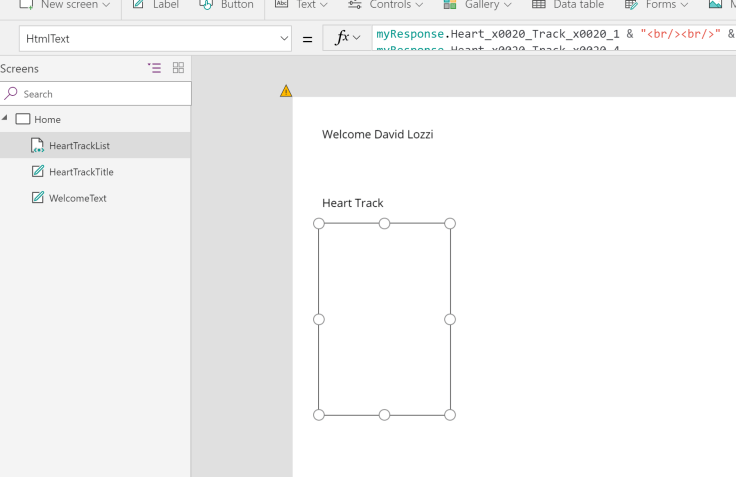
Next, let’s show some data from SharePoint. I inserted an HTML Text control and set the HtmlText property to:
myResponse.Heart_x0020_Track_x0020_1 & "<br/><br/>" & myResponse.Heart_x0020_Track_x0020_2 & "<br/><br/>" & myResponse.Heart_x0020_Track_x0020_3 & "<br/><br/>" & myResponse.Heart_x0020_Track_x0020_4
As you use your myResponse variable and press ., a menu will appear with the field names from SharePoint. Easy right! Select the field you want.

You’ll notice that space in field names look different. SharePoint translates spaces to _x0020_ for the internal name of a field.
I also included "<br/><br/>" which is HTML for a new line, so the track names will each be on a new line.
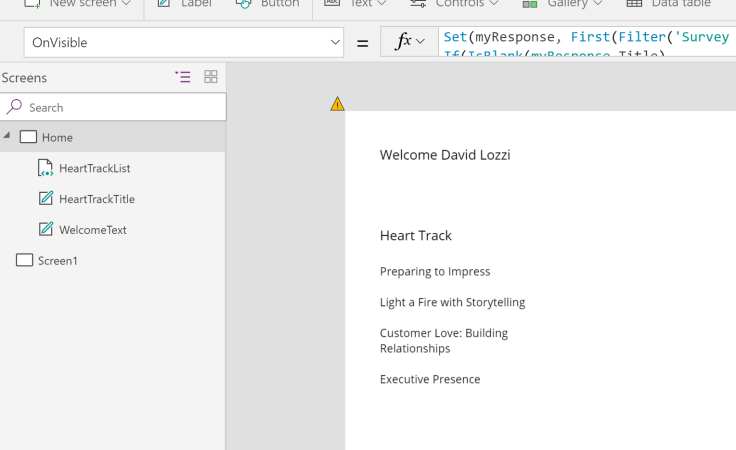
Do you see your data?
Probably not. Remember, we get SharePoint data when the home screen becomes visible. If it’s already visible like it has been, then it doesn’t run, and we don’t get SharePoint data. The trick here is to create another screen (Insert ribbon menu), go to it, then go back home, and your data should load.
From here, keep adding controls for your data, design your screen, follow best practices, create shared styles and themes, and build the app!

Share the App
Once you’re ready to go live with this, you need to share the app. In PowerApps, click File then App Settings. Set the name and icon.
Click Save and save your app.
Then click Share. In the resulting window, you can share it with specific people, groups or the entire organization.

Add to SharePoint
Once you’re happy with your app and ready to share it with everyone, you can easily embed it into a SharePoint page using the PowerApps widget:

Follow the prompts and BLAM you have a PowerApp in SharePoint.
Using it outside of SharePoint
Since we created this app separately from SharePoint, my users could also access it from their mobile devices using the PowerApps app!
 RSS - Posts
Hi David,
I am trying to put the views similiar to a SharePoint list on the canvas PowerApps but unfortunately not able to do it. Could you let me know how to achieve it. (I want to display items on the powerapp home screen according to the views created on the backend SharePoint list.)